Conceptual Basis
Inspired by childhood travel, Helen Frankenthaler transformed real and imagined landscapes into deep abstract paintings in which elements of nature became organic shapes and rich fields of color. Frankenthaler created these shapes and colors using her own soak-stain technique, which consists of pouring thinned paint onto large, untreated canvases, thereby staining the canvases with color.
Helen Frankenthaler
(American, 1928–2011)
Round Trip, 1957
Oil on canvas
70 1/4 x 70 1/4 inches (178.4 x. 178.4 cm)
Collection Albright-Knox Art Gallery, Buffalo, New York
Gift of James I. Merrill, 1958
RCA1958:1
- Become familiar with the artist Helen Frankenthaler and her soak-stain technique.
- Support the understanding of basic art elements and principles.
- Create an abstract painting of a landscape that holds a special meaning to the artist.
- Untreated canvas
- Pencils
- Acrylic paints or liquid watercolor
- Water
- Small paper cups
- Eye droppers (optional)
- Small paintbrushes (optional)
About the Artist
Helen Frankenthaler was born in 1928 in Manhattan to a family that fostered her artistic talent from a young age. She was encouraged to pursue an education and professional career in art and studied under Paul Feeley at Bennington College in Vermont. It was during her studies that she was inspired by the Abstract Expressionism movement, becoming friends with leading artists of the period, including Jackson Pollock (American, 1912–1956). Frankenthaler developed her own innovative soak-stain technique by thinning her paint with turpentine or water and pouring it onto bare canvas so that the pigment soaked into the untreated surface. Frankenthaler, who was only ever partially in control of the final outcome of the soak stains, referred to the overlapping paint as “well-ordered collisions.”
Frankenthaler’s artistic philosophy was that “The only rule is that there are no rules. Anything is possible . . . . It’s all about risks, deliberate risks.” This statement exemplifies her commitment to exploring the artmaking process, especially the risks of free-flowing paint stains on her canvases.
About the Art
Round Trip, 1957, in the Collection of the Albright-Knox, is a colorful fusion of Frankenthaler’s gestural brushstrokes and soak-stain application. A limited color palate of red, purple, green, and yellow are balanced throughout the work, floating and scattered around the canvas. Black brush strokes delineating a variety of shapes and lines sprout from the lower half of the canvas. From the title, Round Trip, one can imagine the abstract forms as the dreamlike scenery of a landscape the artist experienced on a trip. The black strokes appear to resemble objects and/or people the artist saw on her journey. The effects of free-flowing paint can be seen in the haloes surrounding the bright blotches of color in this work. These nimbuses are the results of the turpentine—used as paint thinner—spreading farther than the thicker oil paint.
landscape: a picture that depicts a scene of land
soak stain: technique that consists of pouring thinned paint onto a large, untreated canvas, thereby staining a surface with color
organic: shapes or forms in a work of art that are of irregular contour or resemble a natural element
- When first displaying Frankenthaler’s Round Trip, 1957, to students, try withholding the name of the artwork. Allow for discussion to arise about what the students view in the artwork and what they imagine to be the subject of the work. Do their perspectives change when you reveal the title of the artwork? How does the title enhance their views regarding the subject of the work?
- Ask each student to think of a time she went on a trip. What stands out in her memories of this trip, perhaps a particular activity or a special landmark? If a student has not been on a trip before, guide her to imagine a trip she would like to go on. For the artmaking activity, have each student bring in an image of a landscape that represents what she saw or experienced on her trip or of a place she would like to visit.
Have students use markers to trace the large basic shapes that make up their chosen landscapes, including the horizon line, any mountainous areas, and even any large clouds. Encourage students to only trace the most important parts of the landscapes—this will help them focus on the main aspects of their landscapes rather than the finer details of those shapes.
Once students have identified the key elements of their landscapes, they should begin transferring those shapes onto their untreated canvases. Instruct students to use light pencil lines when drawing on their surfaces so that the pencil marks do not show up in their final works.
Once they have transferred the lines onto their canvases, students should wet their canvases by running them under a sink faucet. Balling the canvases up while under the water will help evenly distribute the liquid. Starting with a damp canvas will allow paint to soak into the surface. Once the students have wrung out and flattened their canvases, they are ready to apply their paints using the soak-stain technique. If you are working with upper-grade students, they could make their own thinned paints. Younger students may require premade thinned paints.
Diluting acrylic paint with water will create a stain. To thin your acrylic paint, add a small squirt of paint into an empty cup, add one part water to one part paint, and mix until combined in a smooth liquid. To make the mixture less transparent, add additional paint. For a more transparent mixture, add water. You will need to make separate mixtures for each color students wish to use in their landscapes. Try to create enough of the paint for the scale of the shapes in the students’ works. Larger shapes will require more paint. Applying one large area of color rather than multiple different patches of color will give the work a more fluid, unified look. If you choose to not make your own diluted paints, liquid watercolors can be used as a substitute material.
Once the thinned paints are ready, students should slowly pour the paints into the outlines of the different shapes on their canvases. Instruct them to pour while moving around the shapes to allow for an even distribution of stain. Encourage patience while the paint soaks into their canvases. To move the stains into certain areas of the canvases, students can gently push any puddled colors with small brushes. Allow for the paint puddles to soak into the canvases. Students can lightly dab any excess liquid with paper towels if the paint puddles are excessive.
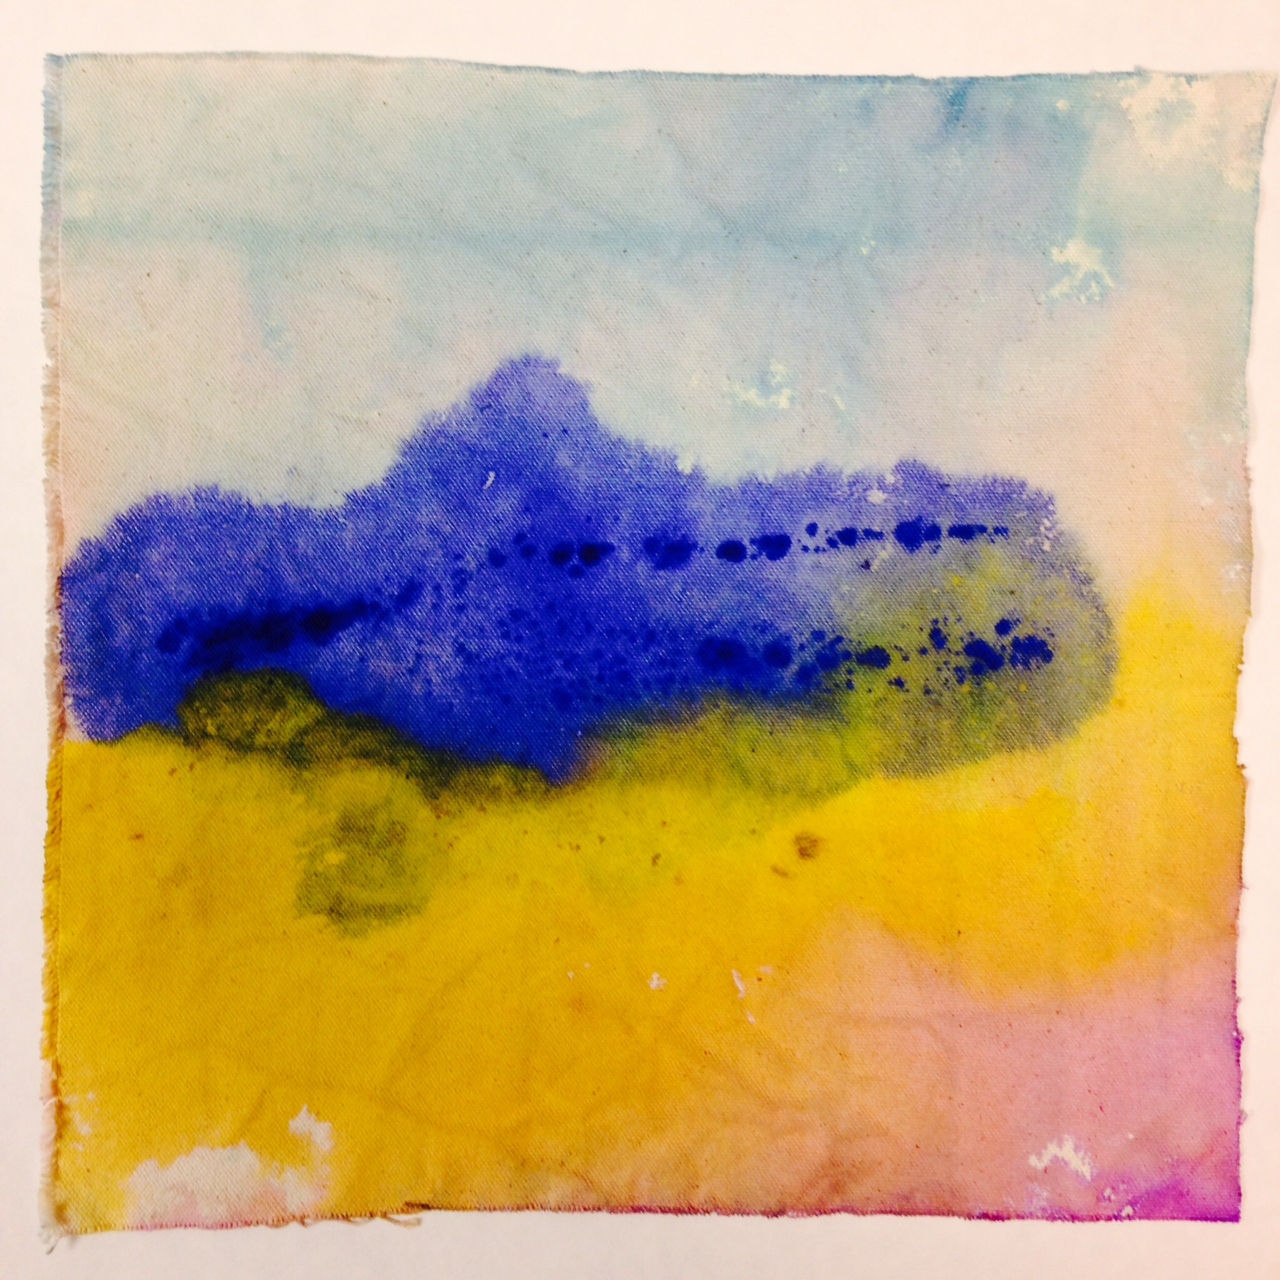
Colors may run together when you add additional paint. Remind students that these are not imperfections but “well-ordered collisions.” Once complete, allow the paintings to dry completely on a flat surface. If you are relocating the wet canvases to a drying area, be mindful that paint may drip from the bottom.
Lesson Tips:
- This experimental project is geared toward experiencing the artmaking process of Helen Frankenthaler. If students get discouraged at the lack of control over their paint, remind them that the focus is meant to be on the process rather than the finished work.
- This project can be quiet messy. Allow for ample drying areas around your classroom. This project would work well outside due to the amount of water and diluted paint used. It would be ideal to work on a plastic surface that can easily be wiped clean with a sponge.
- For older students, suggest adding gestural brush strokes or detailed pen-and-ink designs to enhance the landscape scenes.
- Not all areas of the works need to be filled with color. Raw canvas is an element of many of Frankenthaler’s paintings.
- Pouring the paint might be difficult for younger students. Instead of pouring with cups, try using spoons to carefully ladle the paint or eye droppers to portion limited amounts of color onto the surface. This will allow for fewer paint puddles on the canvas.
- If acrylic or liquid watercolor paints are not available to you, you can use old markers and water to create your own tinted stain. You will need multiple markers in a variety of colors. Pop off the back of each marker, pull out the sponge marker middle, and add the sponge middle to a cup of water. Try to have at least five sponges of one color in each cup. Over a few days, the pigment from the marker will seep into the water, creating liquid watercolor. This is a great way to recycle dried-up markers in your classroom!
- Have students present the soak-stained landscapes they created—and what they learned from creating them—to their classmates in order to reinforce the lesson, as well as enhance their understanding of what they learned or experienced. Students can explain the different elements of their works and give insight into the landscapes they chose.
- Having students complete a short writing assignment or reflection about their artmaking process can give teachers insight for subsequent iterations of this project.
- New York State Learning Standards for the Arts: 1, 2, and 3
- New York State Learning Standards for Mathematics, Science, and Technology Education: 4
- New York State Learning Standards for Social Studies: 3
- College and Career Readiness Anchor Standards for Reading: 2, 3, 7, 8, 10
- College and Career Readiness Anchor Standards for Writing: 1, 2, 3, 5
- College and Career Readiness Anchor Standards for Speaking and Listening: 1, 2, 3, 4
- College and Career Readiness Anchor Standards for Language: 1, 2, 5
- College and Career Readiness Anchor Standards for Mathematical Practice: 1, 2, 7